Microsoft Edge: An Accessibility Overview

We’ve looked at Chrome’s accessibility add-ons in the past, and while that browser is still a great option for accessible web browsing, some users have found that Chrome has become noticeably sluggish in recent years, especially when using specialized extensions.
On the other hand, Microsoft’s built-in browser Edge has improved over the same period of time. It’s often more responsive than Chrome, and, with Edge all the accessibility features are built-in and ready to be toggled with no downloads or searching required. Of course, that means that Edge is less customizable than Chrome, but for the vast majority of users, Edge’s built in features are more than adequate.
Today we are going to do a full overview of the accessibility features that Edge currently has to offer. The shortcut examples we mention will be in Windows format, but you can click the link in the next sentence to see the complete list of shortcuts for Mac. To see the complete list including shortcut guides for both Windows and Mac, please click here.
First, to access these settings, go to Settings and more > Settings > Accessibility.
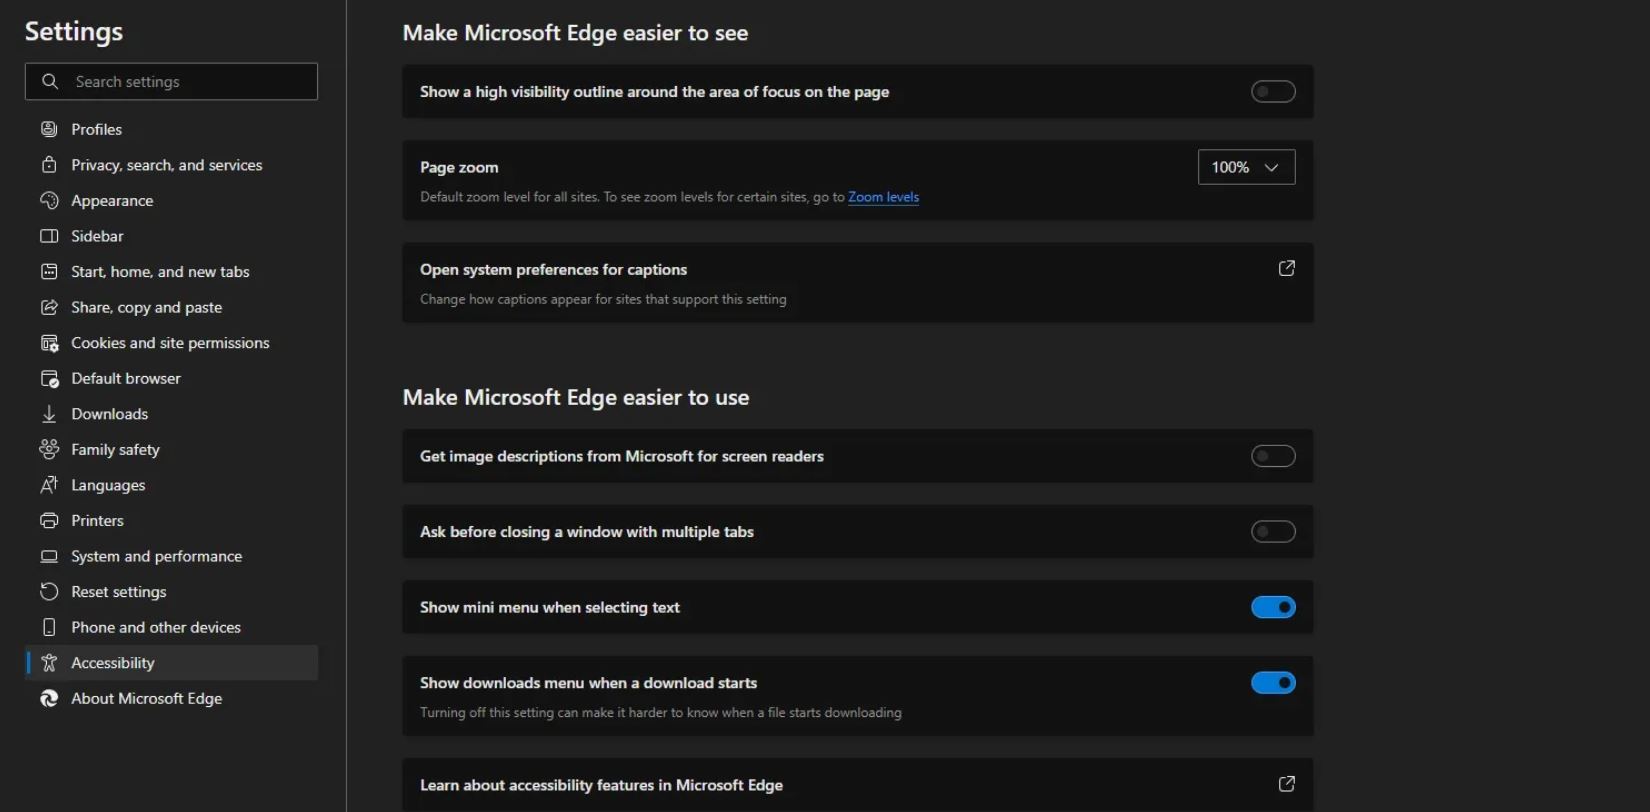
Enlarge Text – To enlarge text, you can either go into the settings to manually adjust your zoom level or, you can use your keyboard.
Shortcuts:
Ctrl + Scroll wheel up/down = Zoom in/out
Ctrl + zero (0) = Reset zoom level to default
Ctrl + plus sign (+) = Zoom in by 25%
Read Aloud – Edge has the ability to read web content out loud. To activate read aloud, right click on an open web page and select Read aloud.
Shortcuts:
Ctrl + Shift + U = Start or stop Read aloud
Immersive Reader – Immersive reader will not only read content out loud, but it’ll also display highlighted text in a clean, distraction free window. You can access this feature by simply clicking on Enter Immersive Reader from your address bar or via the shortcut listed below.
Shortcut:
F9 = Enter or exit Immersive Reader
Generate Image Descriptions – For users with visual impairments, image descriptions help give context to the content they are reading online. However, not every website has visual descriptions set up. Turning this feature on will cause Microsoft Edge to automatically generate descriptions for unlabeled images on any website.
High Visibility Outline – The high visibility focus indicator is another tool for users with visual impairments. With this feature on, any element that you focus on will be outlined in black and white.
Keyboard Surfing – Whether or not you have mobility challenges, using your keyboard to browse the web is an efficient way of accessing the internet.
Shortcuts:
F6 = Move focus to the next browser pane
Shift + F6 = Move focus to the previous browser pane
Ctrl + F6 = Move focus to the web content pane
Caret Browsing – Turn this feature on to browse using only your cursor.
Shortcuts:
F7 = Turn caret browsing on or off
High Contrast – Turning this feature on changes the color scheme of your web page to a high contrast palette that is easier to read.
Shortcuts:
Left Alt + Left Shift + Print Screen = Turn high contrast mode on or off
Caption Customization – Edge can even close caption certain sites, making the web even easier to use without sound. Those options can be managed through Settings and more > Settings > Accessibility.
This post originally appeared on the AT Help Desk website.
Tags: accessibility, apps, assistive technology, AT HelpDesk, Atlantic Regional Office