Today we’re going to look at an app that’s designed to narrate the outside world to individuals with low or no vision: Seeing AI. This free app provides accurate audio descriptions of the outside world, using an abundance of features to simulate sight, backed by human-like intelligence. The idea for the app is simple; point your camera at person, product, object, document, color, or piece of text, and the app will give you a highly accurate description of the object in question.
Once you load the app, you will have to give the app permission to access your camera and photos. Once you give the app permission to use your camera, the rear camera will begin showing video on the screen. If the camera sees any text on screen, it will begin to read the text out loud. As for the interface, there are panels located in the corners and the bottom.
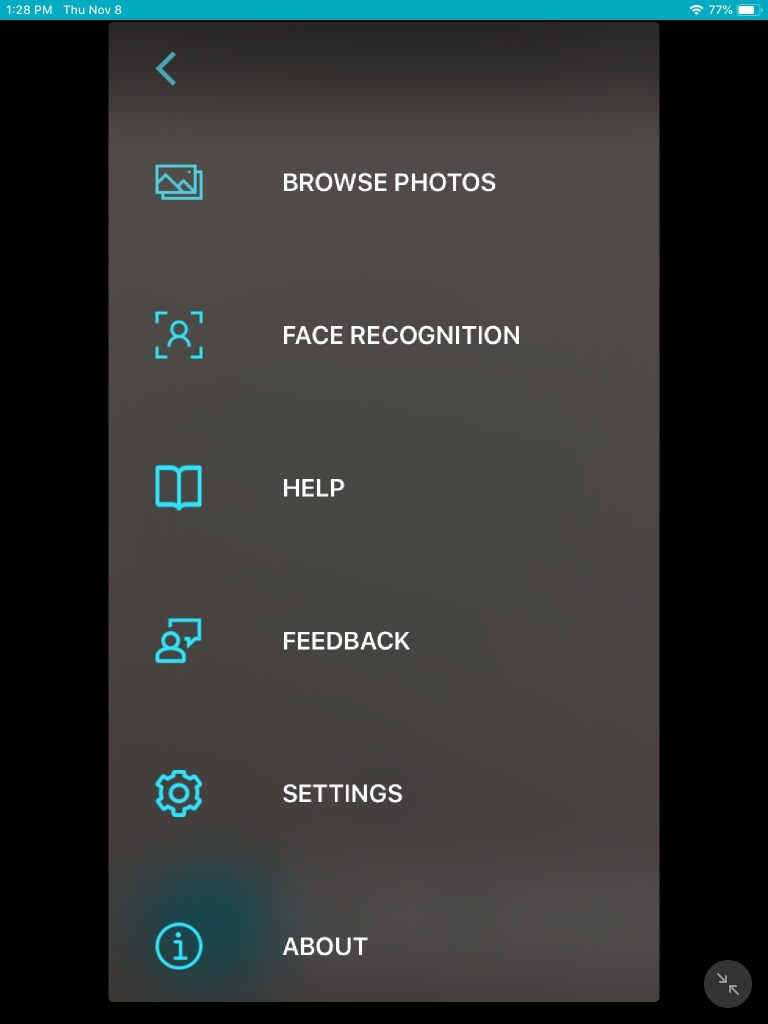
First, let’s take a look at the non-camera functions and settings:
Browse photos
The app will analyze any picture in your device and describe it to you.
Face recognition
The app uses your phone’s front-facing camera to snap pictures of people you want the rear camera to recognize later. The camera can then detect people in the room or further away in the environment. The camera also detects distance.
Help
There is a detailed help section available to those in need of assistance.
Settings
Here you can pick the type of currency you want the camera to detect and read back to you. You can manage lighting to allow the App to turn on the LED to help with low lights and detection issues. You may also select voice type, speed and volume. Lastly, you may also make sure that the most recent photos are the ones to be analyzed for description.
Once you leave the settings, you will be taken back to the main panel with the rear camera actively searching for text to read. In the upper right is the contextual help for each activity. Near the bottom center of the screen, above the sub-panels, is a pause button.
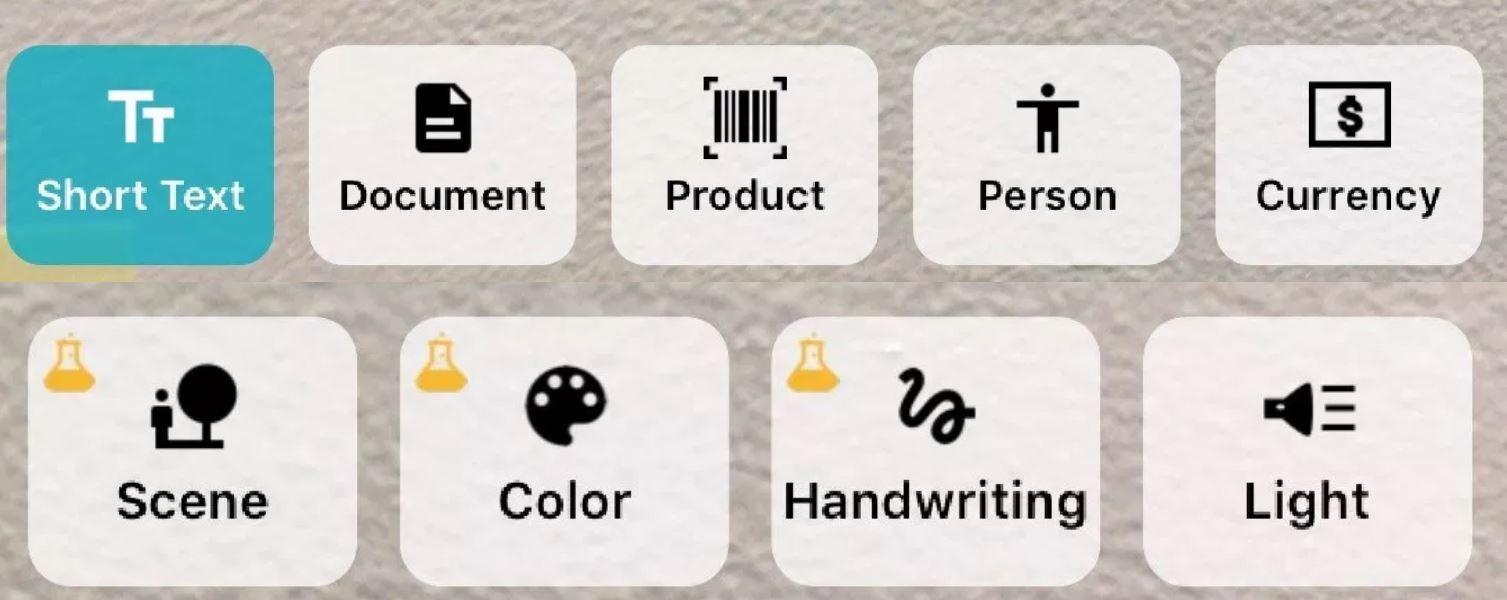
Camera Modes
Listed below are the different camera modes currently available with the app. For each mode you select, the name of the mode will be read out loud, so users will not get lost. The panels at the bottom of the screen scroll from left to right. Each has their own function and some functions will change on-screen elements.
Starting from the left, the modes are as follows:
Short text
Point the camera at any short text on anything and it will just read it back to you.
Document
Here, you will be able to scan full documents. A voice will guide you to get the perfect image. The app will take a snap and process it. If you have some vision you will quickly notice a floating button to the middle-left of the screen. Hit the button to take a manual shot. Once you have the picture the panel will change and display the text on the screen. You have a few things you can do with the captured text. At the bottom right corner, you may save a picture of what you took or share the text extracted from the scan. Just to the left of the right corner are two buttons you may use to increase and decrease the font size for easy reading. To the far left you may hit the play button to hear the document spoken back to you. Just to the right of the left corner is a stop button.
Product
Listen to the prompts to align your product bar-code. Once the bar-code is detected, it will read you back all the relevant details.
Person
Here you have voice assisted picture taking. The floating button to the center-left is still there for manual shots. Just above the bottom panels and to the right you will find the camera switch changes from rear to front-facing respectively. If you have a friend whose face you have added to your face detection list, you will be notified when that person is in the room, how far they are from you, their posture, and finally, their facial expression. Once the shot has been taken, you can save your photo from the button on the bottom left of the screen. You may share with the button on the bottom right of the screen.
Currency
Use this mode to identify currency.
Scene
Get an idea of what your surroundings look like. Take a picture and have the scene described to you. The manual snap button is center-left. Once you have your shot you can decide what to do with it. Save is on the bottom left and share is on the bottom right.
Color
Aim your camera at a color and the app will identify the color and announce it out loud.
Handwriting
Reads handwriting. You can save it with the buttons at the bottom left or share it with a button on the bottom right.
Light
This mode will detect light by its intensity, helping you find and identify all forms of light in your environment.
The Breakdown:
Pros
An abundance of helpful features to simulate sight.
Amazingly accurate descriptions of objects.
Modes to fit almost every scenario.
Cons
The app is rather large at 243.8MB.
The interface could be better. A radial dial user interface with a contextual swipe system would have served this app so much better.
Available for iOS only.
Final thoughts
The app provides real-time sight, facial recognition, reads expressions, posture and distance, can identify text and read it out loud, and more. The app will even turn on the light to better identify its target. Even with extensive use the app crashes only when users go back and forth through apps too often. With so many useful features packed in to such an effective and reliable package, this app is a must-have for anybody with low or no vision.